


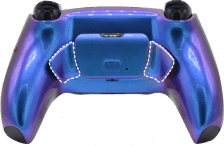
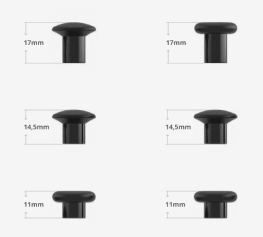
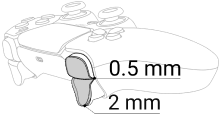


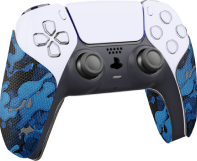
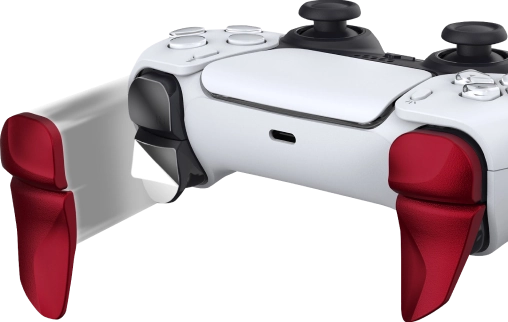
PS5 Controller Shoulder Button Extenders
Custom Triggers & Bumpers to Increase
Speed and Improves Accuracy
Update your browser to view this website correctly. Update my browser now
PS5 Controller Shoulder Button Extenders
Custom Triggers & Bumpers to Increase
Speed and Improves Accuracy
This article contains the following sections:
At Glance
Game Mechanics. In COD Warzone your character can clip up to 3 plates of armor with each plate adding 50 hit points to your character’s health pool. This gives you a total maximum health of 250 if you have all 3 plates equipped. This 250 applies to headshots, as well as body shots even though the armor doesn’t cover your character’s head. In addition to wearing up to 3 plates of armor, your character has room for 5 armor plates in his inventory, and you can purchase a full stack of 5 armor plates for $1,500 at a buy station. Once a plate has been damaged or broken, it can be repaired with one of the plates from your inventory. Your character will always restore a partial armor plate before installing a new one. For instance, if you have 80% of the armor plate left, then the very first armor plate that you put in during the repair process is only going to take that armor plate up to full.
There are 4 phases of fixing armor.
Overall the whole process takes about 4.5 sec for most weapons.
Improving Armor Repair Time.
Mod Mechanics. The Mod has been designed to ease the armor repair process and take away the need to hold down the switching weapon button (Triangle) for up to 5 seconds. The Mod ability allows the user to free up the thumb finger and get a better focus on aiming and shooting. There are 2 ways to execute the mod. Depending on your gaming style and preferences you will get to choose between 3 different sub-mode configurations.
There are a few things to keep in mind:
In-Depth


One of the open LEDs will glow in PINK indicating that a special feature has been activated.


Want to learn more about how LED MOD Indicator works? Click Here
The mod can be turned OFF the same way it has been turned ON (see above).
Modes located on 2 - 4 LED Indicator slots (Including Armor Repair Assist) can be turned OFF all at once by holding down the mod button on the back and tapping the button X


All 2, 3, and 4 LEDs will turn off indicating that all special features have been turned OFF.
Armor Repair Assist offers 3 sub-modes. You can always check what sub-mode you have currently active by following these steps:


The LED indicator will flash all 4 slots in WHITE indicating that the modchip entered the sub-mode checker menu. Then it will show the number of a sub-mode you have active:
Upon checking the sub-mode, the modchip will take you to the place you were before in 3 seconds automatically. You are welcome to expedite the process by pressing the mod button on the back and exiting the sub-mode menu.
To change Armor Repair Assist sub-modes, you will have to go through the sub-mode checking menu first (see above).
Use the R2 button to increase the number of sub-mode or use the L2 button to go down on a sub-mode.
To save the setting, you will have to press the Mod Button.
NOTE: Keep in mind, there is a “3-second rule” that applies every time you check or change sub-modes. If you’ve been inactive for more than 3 seconds, the modchip will exit checking/changing the sub-mode menu automatically.
TIP: There is a “Quick Sub-Mode Scroll” option available on every Mega Modz Controller allowing you to get to the desired sub-mode quickly and avoid waiting for the modchip to go through the sequence of sub-modes. Quickly tapping the R2 button will increase the sub-mode number by the number of times the R2 button was tapped, getting you to the desired sub-mode instantly. Quickly tapping the L2 button will decrease the sub-mode number by the number of times the L2 button was tapped, getting you to the desired sub-mode rapidly. Example: You have sub-mode #1 active, quickly tapping the R2 button twice will take you to sub-mode #3. Tapping on the R2 button 5 times will take you to sub-mode #6 (if available).
There are 2 sub-modes available:
| Sub-Modes | Activation Button | Configuration | Performance |
|---|---|---|---|
| 1 | Square | Triangle (repairing button) gets remapped to the Square button | Double-Tap the Square, the modchip will hold down the Triangle (repairing button) for 5 seconds. |
| 2 | L2 | Triangle (repairing button) gets remapped to the L2 | Anytime you briefly press the L2 button, the modchip will hold the Triangle (repairing button) for 350 ms. If you hold down the ADS (L2) button for longer than 500 ms then the function won't work. |
| 3 | L2 | Both the above configurations in one sub-mode | Advanced setting for ultimate performance. Double-Tap the Square button and repair your armor up to 3 plates at a time. Or briefly press the L2 to repair the armor one plate at a time. |
NOTE: The first sub-mode will use as many armor plates as it needs to fully repair the armor. Keep in mind that it will only apply to the number of available plates in your inventory. If you need to both reload your gun and repair armor, decide which action you want to perform first.
- Press the Square button once to reload your gun.
- Double-Tapping the Square will repair your armor.
The downside of this configuration is that while the Triangle button is being held down for 4.5 seconds by the modchip the user won't be able to interrupt the process. During this sequence, you won't be able to either shoot or swap your weapon until the armor repair process is completely finished.
The second sub-mode will repair armor one plate at a time. The user will only be able to execute the Mod if the ADS button (L2) is pressed and released within 500 ms. This mechanic ensures that the Mod won't interrupt intensive fights while repeatably aiming down sight and shooting.
The third sub-mode will let the user enjoy both of the above configurations at once. Now, depending on the armor damage you can choose how many plates you will apply. Quickly tap the ADS button to apply one plate or double-tap on the Square to apply up to 3 armor plates at once.
LIMITATIONS: Armor Repair Assist Mod cannot be used with Auto Heal, Auto Spot, and Fast Reload simultaneously, and it won’t let the user activate them at the same time. Choosing one over another will replace one by another on the LED Mod Indicator.
NOTIFICATIONS: Mega Modz modchip technology notifies you when mods get turned ON and OFF. The modchip will send a signal to rumble motors anytime you activate or deactivate mods. The feature will allow you to focus on gameplay and keep your eyes on the screen without looking at the LED Indicator.
Want to learn more about Mega Modz Haptic Technology? Click Here
Armor Repair Assist Mod was exclusively designed for Call Of Duty Warzone. Be sure to choose the sub-mode that fits your style.
Having issues operating your Mega Modz Controller? Visit our Community Forums for troubleshooting.
Already have an account?