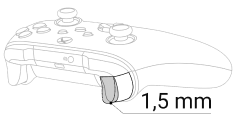


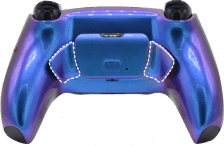

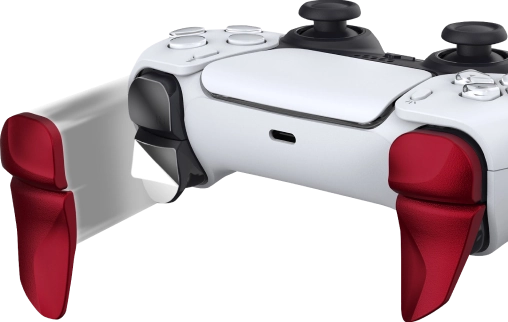
PS5 Controller Shoulder Button Extenders
Custom Triggers & Bumpers to Increase
Speed and Improves Accuracy
Update your browser to view this website correctly. Update my browser now
PS5 Controller Shoulder Button Extenders
Custom Triggers & Bumpers to Increase
Speed and Improves Accuracy
Please note that all the information below is identical for PS5, and DualSense Edge Modded Controllers. There is no difference from the user standpoint as far as mods indications and operating steps are concerned. In places where the steps are different, additional notes for the PS5, and DualSense Edge mods are provided.
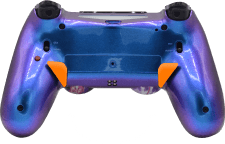
Since DualShock 4 has no Player LEDs, we have installed our own LED indicator - a custom lens. It is located in the middle of the bottom of the controller. It is a square with 4 LEDs: Player 1 - upper left; Player 2 - upper right; Player 3 - bottom left; Player 4 - bottom right.
Player 1 LED indicates the following shooting mods ONLY: Rapid Fire, Dual Trigger Rapid Fire, Jitter, Akimbo, and Auto Burst. Each of these mods has a certain color associated with it so that users will be able to see which mod has been activated at any time. Only one shooting mod can be activated at once (for example, if you have activated Rapid Fire and want to enable Jitter, you will have to choose between them as both of them can not be used simultaneously). Each Shooting Mod can be easily replaced with any other Shooting Mod without any deactivation steps (for example, if you have Rapid Fire on and want to activate Jitter, you will only have to enable Jitter and it will automatically replace Rapid Fire on Player 1 LED).
Players 2, 3, and 4 indicate other Special Mods: Quick Scope, Sniper Breath, Fast Reload, Dropshot + Jumpshot, Zombie Auto Aim, Auto Spot, Auto Sprint, and Turbo Melee. Each of these mods has a specific color associated with it and this color may coincide with the color of some Shooting Mods but you will never get confused since Special Mods are always indicated on Player 2, 3, or 4 and Shooting Mods are always shown on Player 1. Users can have 3 Special Mods activated simultaneously in addition to one Shooting Mod.
PS4 modded controller by Mega Modz can have up to 4 different mods activated at the same time: one Shooting Mod ( Player 1 LED) and 3 Special Mods (Player 2, 3, or 4 LEDs).
Once activated, Special Mod on Player LEDs 2, 3, or 4 will always take an available slot in the following order: Player 2, Player 3, and then Player 4. For example, you haven’t activated any Special Mods and have Player 2, 3, and 4 LEDs available. You decide to activate the Drop shot and after it has been enabled, it will take the first available slot according to the order - Player 2 LED and will stay lit with Dropshot special color. After that, you enable Sniper Breath and it will go to Player 3 LED and stay lit with Sniper Breath's special color. If you want to activate Fast Reload, in addition, to Drop shot and Sniper Breath, it will take Player 4 LED and stay lit with Fast Reload special color. Thus you have just taken all available LEDs and have 3 Special Mods enabled at the same time.
If you want to activate more Special Mods on Player 2, 3, or 4 LEDs, you will need to “free up” a slot and disable one of the activated mods. Therefore, you will be replacing mods on available slots with the mods you want to change them with. For example, you want to activate Turbo Melee and decide to replace the Drop Shot with it. You will first have to deactivate the Drop Shot and LED 2 will become available. Now you can activate Turbo Melee on Player 2 LED and it will light up with Turbo Melee mod special color indicating the mod is on.
If you want to replace all 3 Special Mods with new ones, you just hold down the mod switch and tap the X button. LEDs 2, 3, and 4 will turn off and now you have 3 available slots for new Special Mods.
The controller will always remember the last setup before powering down.
Mega Modz LED Indicator lets the user interact with the modchip and be aware of what functions are active at any time. It also helps to scroll between sub-modes and set up custom values.
Sub-modes and custom speeds have a common way of indicating numbers. The modchip uses different color layers to reflect the numbers on the Indicator. Layers overlap each other.
The first color layer is RED.
It’s good for showing numbers 1 - 4.
Example: Sub-mode or speed = 1. One red light will flash and stay lit.
Example: Sub-mode or speed = 3. Three red lights will flash and stay lit.
Anytime all 4 LEDs light up in yellow that means the digit number is 0 (not applicable for sub-modes indication)
The second color layer is GREEN.
It’s good for showing numbers 5 - 8. Green color LEDs will overlap Red if the number of a sub-mode or speed is greater than 4 but less than 9.
Example: Sub-mode or speed = 5. Only one green LED will overlap 4 RED color LEDs.
If the sub-mode or speed is 8 then all 4 RED LED lights will be overlapped with Green.
The third color layer is Blue. It’s good for showing numbers 9 -12. The maximum number for speeds is and will always be 9 (as 9 is the max digit, for example 9.99).
The maximum number for a sub-mode is 10 currently (as 10 is the max number of sub-modes available for some mods). Blue color LEDs will overlap Green.
Example: Sub-mode = 10. The LED indicator will show all RED first (4), then RED will be overlapped with GREEN (8), then 2 GREENs will be overlapped with BLUE (10).
Example: Speed = 9. The LED indicator will show all RED first (4), then RED will be overlapped with GREEN (8), then 1 GREEN will be overlapped with BLUE (9).
| Shooting Mods ( Player 1 LED) | Color |
| Rapid Fire | Red |
| Dual Trigger RF | Purple |
| Akimbo | Blue |
| Auto Burst | Green |
| Jitter | Yellow |
| Special Mods ( Player 2, 3, and 4 LEDs) | Color |
| Auto Heal | Cyan |
| Quick Scope | Red |
| Sniper Breath | Green |
| Fast Reload | Blue |
| Dropshot + Jumpshot | Orange |
| Zombie Auto Aim | White |
| Auto Spot | Yellow |
| Auto Sprint | Aqua / Light Blue |
| Turbo Melee | Pink |
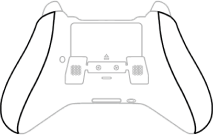
Mega Modz modchip connects to existing rumble motors in the PS4 controller to notify the user when certain operation steps are made. There are two variable-speed motors in the base of the grips that spin up to rumble in sync with any mods activation and deactivation steps.
There are two different rollings “waves” of motions available:
The feature can be disabled via the Programming Mode. To turn the modchip rumble motors notifications OFF, follow the steps below:
Use the same steps above to turn the feature back ON or simply perform Reset To Factory Default. (See below)
Holding down the mod switch will be your first step to performing any of these actions. You will always have to hold it down and then tap other corresponding buttons. The mod switch is only used for activating/deactivating modes, setting up custom settings, and scrolling between sub-modes - you do not have to press it for any other purposes during the gameplay.
The following mods offer a programming mode: Rapid Fire, Dual Trigger RF, Akimbo, Jitter, Quick Scope, Fast Reload, Jump Shot, and Turbo Melee. The main purpose of a programming mode is to allow users to re-write factory settings and set up the most effective speeds/unit delays for favorite weapons/games. It also allows you to find the best speeds/unit delays for future games in case there will be any software changes in the game and factory settings won’t deliver the fastest SPS/optimal unit delays.
Users are welcome to re-write default speeds and set up custom fire rates for their favorite guns. Users can re-program speeds from 5 SPS to 99 SPS ( keep in mind that every game has a speed cap preset by a manufacturer and if you go above it, your gun will shoot slower or won’t shoot at all). Please refer to our Charts to learn more about the max speeds for these mods. Custom speeds are programmed by setting tens, ones, and decimals digits. ( For example, 16.2 speed = 1 tens, 6 ones, and 2 decimals).
Users are welcome to re-program unit delays to ensure optimal performance for their favorite weapons in Call of Duty games. To learn more info on unit delay programming go to the instructional page of the desired mod.
Your controller will always remember the last setup before powering down.
To reset all modes, speeds, and delays to the factory default settings, follow these steps:
PS4 DualShock and PS5 DualSense Controllers:
All four LEDs will glow WHITE indicating the mod is now awaiting further input.
NOTE: If you entered “Programming Mode” accidentally or changed your mind on the way, you’ll have to wait 8 seconds for the modchip to exit “Programming Mode” automatically. There is no other way to exit the Programming Mode.
PS5 DualSense Edge Controller:
All four LEDs will glow WHITE indicating the mod is now awaiting further input.
NOTE: If you entered “Programming Mode” accidentally or changed your mind on the way, you’ll have to wait 8 seconds for the modchip to exit “Programming Mode” automatically. There is no other way to exit the Programming Mode.
Having issues operating your Mega Modz Controller? Visit our Community Forums for troubleshooting.
Already have an account?